
How do I create a new event?
Click the “Create new event” button at the top of the left column of Teams studio, or in the top right corner of either the "Home" or "Events" pages.


• Event name: Choose a unique and descriptive name for your event.

• Player amount: Set the maximum number of expected players. This number can be changed later if needed.

How do I create checkpoints with the Event AI?
Select "Use Event AI" from the two options to automatically create checkpoints for your event.

• Event area: Select the geographical area for your event on the map to the right and set the radius of that event area on the left.

• Checkpoints: Set the number of checkpoints for your event. The estimated playtime is adjusted accordingly but can be changed later.

• Generate checkpoints: After choosing the event area and checkpoint amount, you can now generate checkpoints. Change the settings above to generate your checkpoints again.

• Shuffle checkpoints: Shuffle the generated checkpoints for a more preferable setup.

• Proceed to the next step: Click complete to open up the event builder.

How do I use the event builder?
Select "Build myself" from the two options to manually create checkpoints for your event.

• Event builder:
Create and customize your checkpoints in the event builder.

• Add new location: Right-click anywhere on the map and select “Add location.”

• Add activities: Click the "Add activities" button below your "Activities" list on the left.

• Activity bank: Add activities from the activity bank to your event.

• Create checkpoints: Combine locations with activities by dragging and dropping the activity from your list onto a location to create a checkpoint.

How do i fill in event details?
When your checkpoints are done, click "Event details" at the bottom of the screen to proceed.

• Event name: Update the name of your event if needed.

• Event description: Modify the description of your event shown to players in the app.

• Meet-up spot: Provide or update the meet-up location info shown to players in the app.

• Branding: Personalize the logo and cover image shown to players in the app.

How do I fill in game settings?
Click "Game settings" at the bottom of the screen to set the game settings for your event.

• Game modes: Choose between "Race against time" or any other available game modes.

• Player mode: Select between single player or multiplayer.

• Multiplayer settings: Adjust team sizes, total player amount, and team names.

• Event duration: Set the start date, time, and total duration of your event.


• Publish: Click "Summary" at the bottom of the screen to review and publish the event.

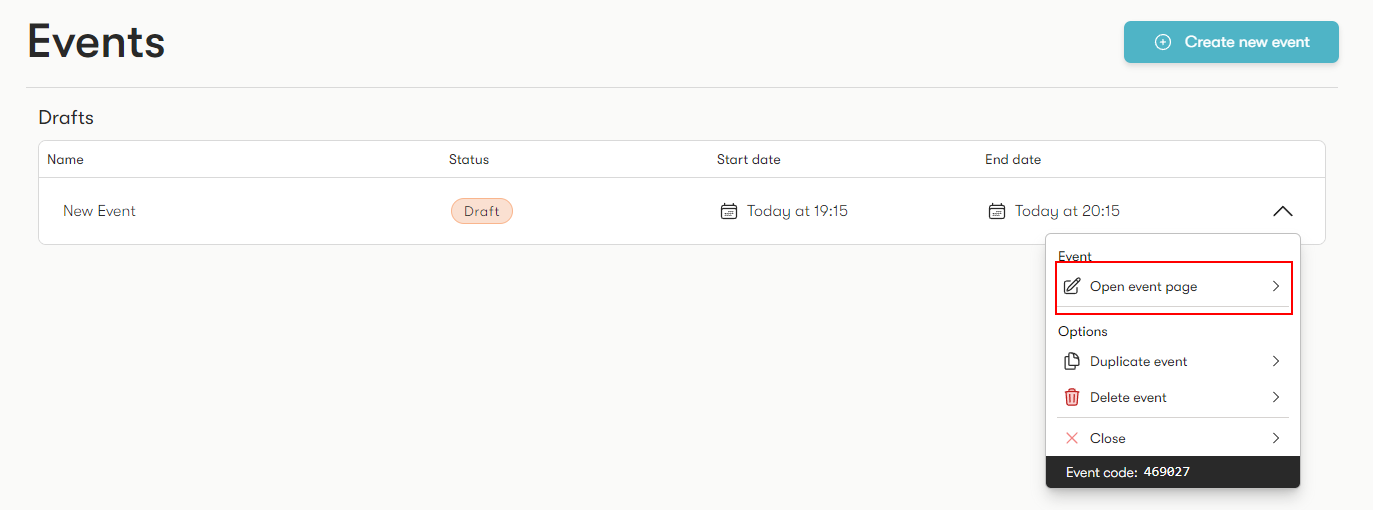
How do I modify an existing event before it starts?
Click an event in your event list and select "Open event page" to modify the event details and game settings before it begins.
• Modify checkpoints: Choose a checkpoint either from the map or "Checkpoints" list.

• Move checkpoint: Select "Move checkpoint" from the drop down list, and then drag and drop the checkpoint marker and confirm.

• Modify activity: Modify the activity in the activity bank or detach the activity to attach a new one from your activity list.

• Remove Checkpoints: Delete checkpoints, any attached activity will be returned to the list.

